


Climbing solo queue in Splatoon 3 requires strict boss luring and ink control. Master freelance rotations to reach Eggsecutive VP without voice comms.
Climbing through Grizzco's corporate ladder with random teammates is brutal. You cannot fix their aim, unfamiliarity with assigned weapons, or slow reflexes. You can, however, control your positioning, target priority, and ink management.
Maintaining Eggsecutive VP (EVP) in freelance demands a complete shift in priorities. You are not just clearing waves—you are actively neutralizing the structural mistakes of random lobbies.
The Solo Freelance Ladder and Hazard Mechanics
Salmon Run spans 10 distinct tiers, from Intern to Eggsecutive VP. In freelance queues, difficulty scales with the lobby's average rating. Once that average reaches 865, the match enters Hazard Level Max. Wave difficulty caps at 333%, pushing the Wave 3 quota to 35 Golden Eggs.
Every rotation reset drops your EVP rating back to 40. Whether you finish at EVP 400 or EVP 999, the next shift drops you right back into the baseline pool. This makes the opening hours of a rotation volatile, mixing high-clearing veterans with players barely hanging on above Profreshional +3.
Payouts scale directly from your pay grade multiplier using the formula (G/100)*(E + P/200) + 50*C, where G is the rank pay grade multiplier, E is Golden Eggs collected, P is Power Eggs gathered, and C indicates a clear. At Profreshional +3, base pay grade multiplier sits at 225%.
| Rank Tier | Pay Grade Multiplier | Rank Reset Floor | Operational Notes |
|---|---|---|---|
| Intern | 100% | 0 | Starting introductory tier. |
| Apprentice | 150% - 155% | 0 | Baseline quota and slow spawn rates. |
| Part-Timer | 160% - 165% | 0 | Intermediate tier before hazard jumps. |
| Go-Getter | 170% - 175% | 0 | Moderate hazard increase; multi-boss spawns begin. |
| Overachiever | 180% - 185% | 0 | Final tier before entering Profreshional grades. |
| Profreshional Part-Timer | 190% - 195% | 40 | Entry Profreshional grade with faster lesser hordes. |
| Profreshional +1 | 200% - 205% | 40 | Pay grade multiplier reaches double base rewards. |
| Profreshional +2 | 210% - 215% | 40 | High hazard level requiring strict boss prioritization. |
| Profreshional +3 | 220% - 225% | 40 | Final bottleneck tier before entering Eggsecutive VP. |
| Eggsecutive VP | Scales to Hazard Level Max (333%) | 40 | Peak tier; max quota caps at 35 eggs per wave. |
Every rank from Profreshional Part-Timer upward resets to 40 points at shift rotations, making early-shift momentum essential to clear demotion buffers.
Boss Prioritization: The Shoreline vs Basket Triage Rule
Shore rushing remains the primary reason freelance teams wipe in Profreshional +3. The game enforces a strict rule: no more than 3 Boss Salmonids of the same type can exist simultaneously on the map. Sprinting to the shoreline to splat the first mobile boss drops eggs where you cannot retrieve them safely, drains your ink tank, and leaves teammates exposed to flanking Chums.
Triage every boss into two operational groups: mobile bosses brought to the basket, and static perimeter snipers eliminated immediately at the shore.
Mobile Bosses: Always Lure to the Basket
- Scrappers: Never shoot a Scrapper at the water's edge. Get its attention, back up toward the basket, stun it with a frontal shot, then circle around to destroy its exposed engine.
- Maws: Stand beside the basket rim, wait for the tracking ring and audio cue, drop a Splat Bomb behind you, and swim forward. Three eggs drop immediately within deposit range.
- Flipper-Floppers: Paint their landing zone when they target high ground near the basket. Breaking their armor at the basket gives three free eggs without giving up high ground.
- Steelheads & Steel Eels: Lead them along ramps toward midground before popping them. Keep winding Eel bodies out of tight basket choke points.
Static Shoreline Threats: Immediate Neutralization
- Flyfish: The highest cross-map threat in Salmon Run. When two or three Flyfish spawn, basket defense collapses fast. Splat them immediately.
- Stingers: Their high-pressure ink streams cut off revive routes and split team formations. Send a high-mobility weapon to shred their pot stacks instantly.
- Big Shots: Their shockwaves disrupt movement and chip away armor. Take out the Big Shot quickly and fire cannon shots if the shoreline is clear, but never camp the cannon at the expense of basket defense.
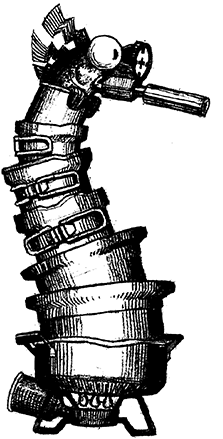
Leaving manageable bosses like Scrappers rolling near the basket prevents the game from spawning a third Flyfish or Stinger due to the 3-boss duplicate limit. Eliminate perimeter threats, lure mobile bosses, and let the eggs travel to you.
If you need to reload your wallet for upcoming rotations or regional DLC, a Nintendo eShop Gift Card (HK) through bittopup provides a quick, reliable way to keep your Nintendo account funded.
Ink Economy and the 67% Golden Egg Throwing Dilemma
Egg throwing is one of Splatoon 3's best tools, but freelance players treat it as their default delivery method. Throwing a Golden Egg drains roughly 67% of a full ink tank. While it paints a small patch at your feet and deals 100 contact damage, it leaves you with less than a third of your ink to handle incoming lesser Salmonids.
Throwing an egg right before running into a Chum or Cohock leaves you unable to fire your main weapon or toss a defensive Splat Bomb. You get splatted, forcing your team into an immediate 3-man disadvantage.
[Egg Drop at Midground]
        │
        ▼
  Ink Level Check
  ├── Above 70%? ──► Throw Egg toward Basket ──► Submerge to Refill Ink Tank
  └── Below 70%? ──► Carry Egg Manually      ──► Clear Lessers with Main Weapon
Transport eggs using these rules: 1. Use Snatchers for Long-Distance Transport: Snatchers fly in from the map edge and carry up to 8 Golden Eggs at a time. Watch their flight path. If a Snatcher flies from a distant shore drop straight over the basket toward its exit point, let it pick up the eggs. Splat it as it passes the basket for an instant cluster drop right at the basket. 2. Manual Basket Deposits Under Pressure: If your ink sits below 70%, walk the egg into the basket. Throwing from two steps away wastes ink you need for self-defense. 3. Chain Throws Only During Clear Windows: When two players work a midground egg cluster, one throws forward while the other catches and deposits. Never chain throw if Stingers or Flyfish missiles target your position.
Night Wave Protocols: Surviving Glowflies and High Tide Chaos
Known Occurrences test raw team coordination without voice communication. Glowflies (Rush) and High Tide end more freelance runs than any other wave types. Surviving them demands disciplined positioning.
The Glowflies (Rush) Chokepoint Rule
Clinging to walls during Glowflies is a costly mistake. Wall hanging disrupts Salmonid pathing. When the swarm gathers underneath a climbing player, the red glowflies can suddenly jump to an unprepared teammate on flat ground, wiping the squad in seconds.
Stack up shoulder-to-shoulder at a single narrow chokepoint near the basket: - If you have a Roller, hold it down and walk forward slowly. Do not flick. A rolling Dynamo Roller or standard Roller crushes incoming Chums and Smallfrys continuously with minimal ink consumption. - High-DPS weapons (Shooters, Splatlings) burn down incoming Goldies. - When the swarm targets you, step slightly behind your frontline Roller to maintain ink coverage.
High Tide Survival
High Tide shrinks the map to tight platforms, accelerating boss congestion. At 333% Hazard Level Max, high tide becomes unmanageable if eggs are ignored.
- Paint all available walls during the 10-second wave preview. Wall ink provides vital vertical escape routes when the floor gets overwhelmed.
- Never dive into the water for a stray egg. A 5-second respawn penalty on high tide will wipe the team.
- Shoot down Drizzler torpedoes immediately. Hitting an airborne torpedo reflects it back along its flight path. Directing that torpedo into the Drizzler scores an instant one-hit kill, bypassing its armor phase and stopping ink rain.
Weapon Archetypes and Rotation Duty Assignment
Without voice chat in freelance queue, you have three seconds during weapon distribution to identify your primary job.
                    [Your Assigned Weapon]
                              │
       ┌──────────────────────┼──────────────────────┐
       ▼                      ▼                      ▼
[Heavy DPS / Anchor]   [Mobility / Slayer]   [Armor-Piercing / Tech]
 (Splatling, Charger)    (Shooter, Dualies)    (Explosher, Slosher)
       │                      │                      │
 ├ Steelheads           ├ Stingers             ├ Flyfish Missile Bays
 ├ Big Shots            ├ Egg Running          ├ Drizzler Reflects
 └ Cohock Hordes        └ Paint Control        └ Chokepoint Clears
1. Heavy Anchors (Chargers, Splatlings, Dynamo Roller)
Boss elimination and crowd suppression take priority. Chargers must pick off Steelhead bombs the moment they inflate. Splatlings hold high ground, shredding Big Shots, Cohocks, and Steel Eels. The Dynamo Roller crushes standard Chums and Smallfrys in a single roll without swinging, acting as a moving shield.
2. Mobile Slayers (Shooters, Dualies, Brushes)
Turf control, egg transport, and Stinger hunting are your duties. High-mobility weapons can slip through enemy ink to take out shoreline Stingers before basket routes get locked down. Keep the area around the basket coated in friendly ink at all times.
3. Armor-Piercing & Explosive Weapons (Explosher, Grizzco Slosher)
Normal Flyfish elimination requires two Splat Bombs, costing 75% ink each. With an Explosher or Grizzco Slosher, fire main weapon shots directly into open Flyfish missile bins. A single Explosher player using this tech can clear three Flyfish in under ten seconds without draining their tank on sub weapons.
If you want to expand your Nintendo Switch account funds for new titles and passes, securing a Hong Kong Nintendo eShop card gives you direct access to the regional eShop storefront.
Special Weapon Management and King Salmonid Execution
You get 2 special weapon charges across all three waves. Hoarding specials until Wave 3 is the most common freelance error. Popping a special in Wave 1 or Wave 2 to prevent a wipe protects your rank points. A Wave 3 wipe costs 0 points in EVP; a Wave 1 wipe costs 20.
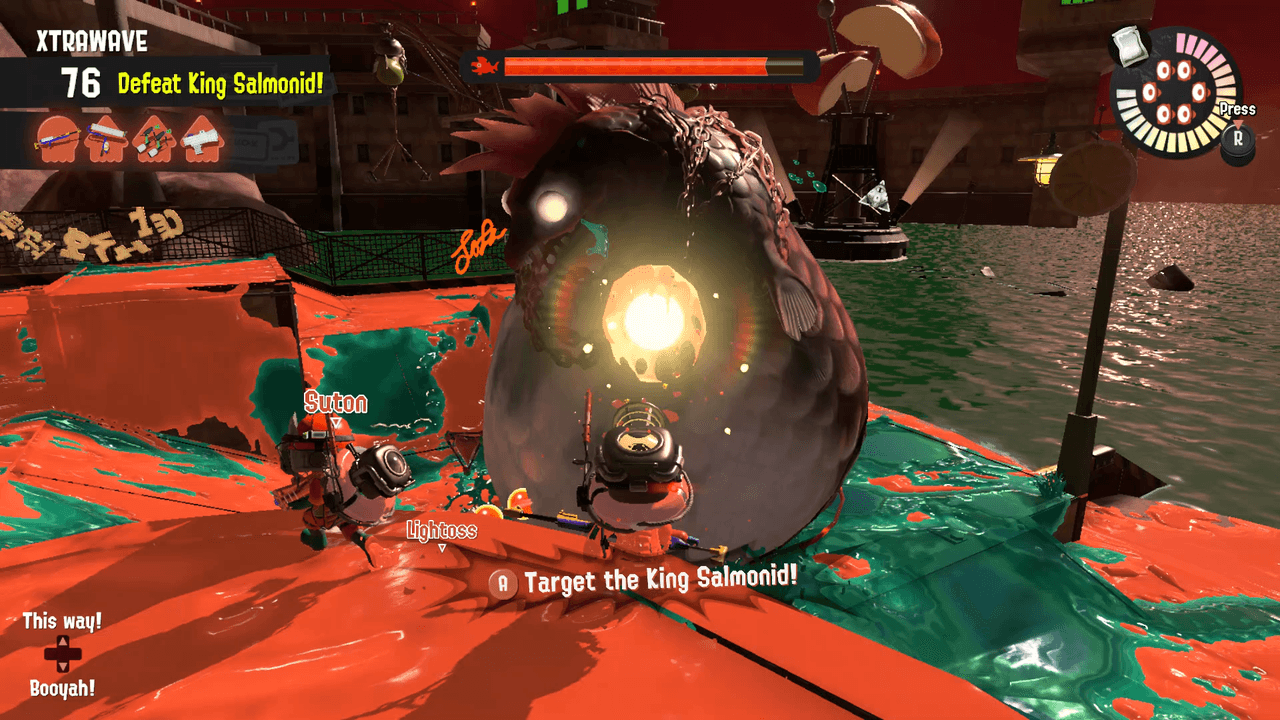
Special Weapon Execution Rules
- Crab Tank: Deals over 3,000 damage in rapid-fire turret mode, making it the highest single-target DPS special in the game. Use explosive mortar shots to destroy Flyfish bins from across the map, or shred Big Shots and King Salmonids.
- Inkjet: Fly above congested zones, fire explosive shots directly into Flyfish bays, and revive downed teammates with direct hits.
- Killer Wail 5.1: Target distant Stingers and Flyfish. Its beams pierce armor and track targets automatically, eliminating perimeter threats while you run eggs.
- Booyah Bomb & Triple Inkstrike: Clear swarmed basket zones, revive multiple fallen teammates simultaneously, and clear high-density boss piles during high tide.
Xtrawave Tactics: Cohozuna and Horrorboros
During an Xtrawave, focus on King Salmonid damage while managing standard boss spawns. Golden Eggs loaded into the egg cannon deal 600 flat damage per shot against King Salmonids and Boss Salmonids.
- Cohozuna Timing: Cohozuna jumps on a fixed 15-second timer at 85, 70, 55, 40, and 25 seconds remaining. Track these timestamps to avoid launching 600-damage egg shots into mid-air.
- Horrorboros Weakpoint: Focus fire on the bomb inflating in Horrorboros's mouth. Popping it requires 2,500 damage, triggering heavy self-damage to the boss and wiping out nearby lesser hordes.
| Encounter Element | Damage / Timing Value | Primary Target / Mechanic | Tactical Execution Note |
|---|---|---|---|
| Egg Cannon Shot | 600 flat damage | King Salmonids & Bosses | Uses 0 ink; fires collected Golden Eggs directly. |
| Crab Tank Turret Mode | Over 3,000 total damage | King Salmonid weakpoints | Highest single-target burst DPS in Salmon Run. |
| Horrorboros Mouth Bomb | 2,500 damage to burst | Mouth weakpoint charge | Triggers massive self-damage and clears local area. |
| Cohozuna Leap Attack | 15s fixed interval | Jump at 85/70/55/40/25s | Avoid firing egg shots during active leap frames. |
| Splat Bomb Sub Weapon | 75% ink tank cost | Flyfish bins & Maws | Normal method to clear Flyfish without special tech. |
Mastering these values prevents wasting specials or egg shots during invulnerability frames.
EVP Badge Checkpoints and Point Scaling Math
High EVP milestones reward permanent Splatsville locker and banner badges tied to specific map clears: EVP 200 (Normal), EVP 400 (Bronze), EVP 600 (Silver), and EVP 999 (Gold).
Scale drop rates also improve as lobby difficulty climbs toward Hazard Level Max (333%). Higher hazards yield better odds for silver and gold scales, needed for shop cosmetics and gear rewards.
| Rank / Hazard Milestone | Silver Scale Drop Rate | Gold Scale Drop Rate | Badge Unlock Tier |
|---|---|---|---|
| 20% Hazard Level | 5.90% | 0.18% | Base Intern level drops. |
| EVP 200 Rating | Scaling (~10-12%) | Scaling (~0.8-1.2%) | Normal Map Stage Badge |
| EVP 400 Rating | Scaling (~14-16%) | Scaling (~1.5-2.0%) | Bronze Map Stage Badge |
| EVP 600 Rating | Scaling (~17-19%) | Scaling (~2.2-2.6%) | Silver Map Stage Badge |
| EVP 999 / 333% Hazard Max | 20.00% | 3.00% | Gold Map Stage Badge |
At Hazard Level Max (333%), shifts award between 2 and 13 scales based on boss damage dealt and clear time. Higher checkpoints offer much higher gold scale yields over extended shifts.
When topping up your balance for seasonal Splatfests or digital game purchases, a discounted Nintendo eShop digital code via bittopup provides quick delivery to keep your account ready.
Five Lethal Mistakes That Cause Freelance Wipeouts
Stuck bouncing between Profreshional +3 and EVP 100? You are probably running into one of these five recurring mistakes.
[Freelance Wipeout Cycle]
Shore Camping ──► Heavy Ink Depletion ──► Lesser Horde Swarm ──► Untouched Flyfish ──► Full Team Wipe
- Camping the Big Shot Cannon: The cannon moves eggs; it is not a defensive position. Staying at the shoreline firing eggs leaves you vulnerable to Steel Eels and Stingers. Shoot three eggs, then return to midground.
- Ignoring Lesser Salmonids: Cohocks and Smallfrys deal lethal damage and steal your mobility ink. With heavy weapons, clear the lesser horde around teammates before isolating bosses.
- Throwing Eggs with an Empty Tank: Never throw an egg when low on ink or standing in enemy paint. The 1.5-second recovery window leaves you completely defenseless.
- Holding Specials Into Defeat: If two teammates go down and the quota is unfulfilled with 30 seconds left, use your special immediately. Triggering a Booyah Bomb after the third player falls is usually too late.
- Failing to Paint Walls During Pregame: Spend the 10 seconds before Wave 1 painting walls, high ledges, and basket ramps. Vertical wall mobility keeps you alive when the ground is swarmed.
FAQ
What is the fastest way to rank up to Eggsecutive VP in solo freelance queue?
Focus on luring mobile bosses like Maws, Scrappers, and Flipper-Floppers directly to the basket while immediately eliminating perimeter Flyfish and Stingers. Maintain strict paint control around main escape routes and use your special weapons proactively during Waves 1 and 2 to avoid rank-dropping early wipes.
How much ink does throwing a Golden Egg consume in Splatoon 3?
Throwing an egg consumes approximately 67% of your total ink tank. Always verify that your ink level is high before throwing so you do not get caught defenseless against nearby lesser Salmonids.
Which bosses should always be lured to the egg basket?
Scrappers, Maws, and Flipper-Floppers should always be lured directly to the basket before defeating them. This drops all three Golden Eggs at the collection point and eliminates wasted travel time across the map.
How do you destroy Flyfish without using Splat Bombs?
You can destroy Flyfish missile bays using main weapon shots from an Explosher or Grizzco Slosher, Crab Tank explosive cannon shots, or Inkjet blasts. Piercing specials like Killer Wail 5.1 can also target and splat the pilot directly through the cockpit.
Why is wall hanging ineffective during Glowflies (Rush) waves?
Wall clinging confuses Salmonid pathing and causes the swarm to gather underneath you, which leads to immediate teammate wipeouts the moment target aggro switches. Grouping at a single chokepoint near the basket allows Rollers and high-DPS weapons to clear the horde safely.
What rank point reset occurs after each Salmon Run rotation?
Eggsecutive VP ranks reset to 40 points at the start of every new weapon rotation regardless of how high you climbed. Lower Profreshional tiers also reset back to their base point floor of 40.
The Solo Freelance Execution Standard
Reaching and holding Eggsecutive VP in freelance matches comes down to disciplined triage. You cannot rely on random teammates to handle Flyfish, manage ink, or lure Maws to the basket. You have to stabilize the match yourself.
Track the 3-boss duplicate limit, eliminate shoreline snipers the moment they spawn, and let mobile bosses carry eggs directly to the basket. Maintain ink discipline, use specials before emergencies get out of hand, and freelance shifts become consistent clears.